
Artist Tools
I'm back again! This article will cover 10 essential steps for the formation of a good, easy-to-read, and effective tutorial. But first, as always, I'll be dividing this article and here are the contents:
- Introduction
- Steps
- Adds Ons
- Example Tutorials
LET'S BEGIN!
Introduction:
"So, starting with the tutorial.Wait I don't know much about creating a tutorial!
 What am I gonna do now??
 "
"To cure this problem of yours, I have a few easy steps that will help you prepare a good tutorial for beginners! I've divided this article into a few steps, so that you can get a simple idea for the information provided. When we make a tutorial, try to keep it in mind that it shouldn't be very long as the readers or viewers may become tired/bored of reading it. So, it should be of an adequate length for the viewers to enjoy the learning experience.
The Steps:
Given below are the topics to help you to make two types of good tutorials that can be read and understood easily:
- Journal/ Article tutorial
- Visual reference tutorial
1. The Journal/Article Tutorial:
These kind of tutorials are comprised of journal entries and articles in the form of tutorials. They can be long but are more informative than visual-based tutorials. These articles/journals may or may not have images in them, but adding imagery is usually encouraged when making a tutorial. So, the steps to the formation of the tutorial are:
- Making A Draft of your article/journal is the initial and very best way to start your tutorial, as it isn't possible to keep working all the time in front of your laptop and devoting all your time toward your tutorial.
- Starting the Tutorial in a formal manner is nice, but making it more friendly and conversational for your deviants can help it achieve better feedback... So start with some opening lines that are not very formal.
- Aligning the body text and adjusting fonts is another method of presenting your articles/journals. Adjusting your font to the best view can increase its presentation and elegance. Also, defining a certain type of alignment to your article/journal gives it a good look.
- Adding Pictures and visuals to your tutorial can help it become more user-friendly to read and understand. Also, please add pictures and visuals under the correct heading and re-size them to a comfortable resolution so that it doesn't hurt the viewer's eyes.
- Summarizing the information is encouraged in areas of the tutorial where long paragraphs are included, but summarizing most of the article should not be necessary.
- Be as correct as possible in your grammar/spelling and don't choose a language in which you are not very adept. Be aware of the sentences and their proper meanings as wrong information can lead to a difficult situations.
- Add bits of extra information in between the text so that your viewers can get a bit of bonus pointers on related topics.
- Add notes and things to remember as they help increase the amount of good feedback and also helps the reader to recapitulate all the things he/she has read.
- Recheck your draft before submitting as it may still have mistakes and bits of things needed to be edited.
- Submit the draft to DA and fill the correct category for it and wait patiently for the incoming feedback!
Add-ons :
You can add a journal skin to your journal entry/article as it ,makes it look more presentable.However, if you're a non-premium member, checkout SimplySilent , :devcss-edited: or other css groups that give codes for non-premium members.Also you can add boxes or other creative stuff matching your journal skin codes.
Example Tutorials:
Tools for using Soft PastelsArtists Toolbox
Hello Deviants!
Today I will be telling you about how to use soft pastels. It is my favorite traditional tool, mainly because I get my fingers all messy while drawing and really feel close to the paper.
What do you need when you want to draw with soft pastels?
Soft pastelsA surface to draw onTissuesA kneaded eraserFixative
About soft pastels
What is special about soft pastels is that they are dry and will turn into dust. While oil pastels will stick, soft pastels will create a powder that is easy to scatter. This gives a lot of freedom in mixing colors, and it is really fun to use!
About the surface
The traditional choice for soft pastels is paper. The best is to choose textured paper, as it will hold the soft pastel a lot better. Traditional paper may be too smooth. Canvas should be avoided as the medium doesn't stick very well to it.
A great tip when working with soft

PE: Tools for taking care of Copic Markers Artist's Toolbox
Introduction
After purchasing some Copic markers they can be a little intimidating on how to look after them. The ideas put forth in this article may also be useful for other brands of refillable markers, but always consult the product's webpage for tips and tricks on how to maintain them.
Firstly, these are the official resources: Downloadable Resources in PDF format or Copic AU FAQ which are the official methods for performing the tasks mentioned below.Note: For best care of markers be careful when replacing and refilling as it is easy to damage markers further, try not to leave the nib removed for a prolonged period of time.
Storing your Markers
When storing any markers ensure that that the caps are placed back on squarely on both ends of the marker

PE: Tools for drawing HorsesArtist's Toolbox Week
Hello everyone,
today I'll be discussing the art of drawing horses and what tools can be quite useful for this task.
I think it's fair to say that those who do not regularly draw horses find them daunting to draw and often make remarks about horses being one of the most difficult subjects to draw.
For those of us who draw them often this is a silly notion, but there is no doubt that we also once struggled with different parts of horse anatomy.
In theory drawing horses is just like drawing anything else - find and define shapes, map out your sketch, refine etc. until you have a drawing you can be proud of.
The reality however is that horse anatomy tends to have strange angles and small quirks that you generally wont notice without looking more closely. Did you know that horse pupils are actually oval and not round?
Okay, so I think we all understand that drawing horses is not as easy as it appears they might be, so let's take some time and discuss different tools t
How to do an Advanced Search on DACommunity Week
DeviantArt is a website that hosts millions of works published with broad search criteria, covering hundreds and thousands of results... Which can be very overwhelming! It is never easy to find what you're looking for and it is common to become lost when navigating among the content, unless you know the best way to perform a good search. This guide will show you what the most used and recommended criteria are to look for specific content in DeviantArt's search engine. To find out, I invite you to continue reading ^^.
It is the main search engine at DeviantArt, which you can find tons of graphic and literary material with. There are parameters that make searching the site either easier and faster. These parameters can be combined to optimize the search and get specific results, those that accommodate our needs and interests. Knowing how to manage this page correctly not only allows you to find w
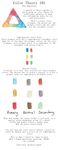
Visual Reference Tutorial :
These type of tutorials usually consist of reference sheets and very long-sized, zoom-able, tutorial sheets that give the information in a brief but effective way so that the viewers get a quick look at the techniques and type of resources used. The steps to the formation for this kind of tutorials are as follows:
- Make your draft sheet on a photo editing program like Adobe Photoshop Creative Suite versions or Gimp etc. and format the layout of the tutorial.
- Add the visuals and picture references as these should make up about 70% of your tutorial and only about 30% of text is required and the text should be brief.
- Write your information in pointsand not in complete sentences as then there will be more of text in a certain tutorial.
- Adjust your font to a small size so that it doesn't disturb the visuals in any way. The text shall be placed below the picture or above or in the sides of the pictures and not ON the picture as it will be disturbing an will take more concentration to understand the picture clearly.
- Adjust the size of the pictures as compared to the layout of the tutorials and also maintain the space it occupies on the project sheet.
- Make sure you don't overfill the pictures you're pasting on the project sheet as then it won't look neat and presentable.
- Make sure the visuals are clearas they should comprise the majority of your project sheet space!
- Add the heading of the project at the last because in the beginning you're not sure how the project would look.
- Make the divisions of different topics clear so that it is easier to navigate the tutorial.
- Submit it to the correct category and wait for the feedback to come!
Add- ons :
Just as the journals have skins for them, you can have a cool-looking background for your tutorial and that needs absolutely no codes! You just can copy & paste a suitable image over your project sheet or make your own background in the picture editing program to give your tutorial a more presentable look!
Example Tutorials:


I hope you all liked the tutorial even if it didn't have any enchanting visuals but I expect the information to be helpful enough!And a BIG THANX to all my FRIENDS AND ALL OTHERS WHO'VE INSPIRED ME THROUGHOUT TILL MY ART JOURNEY!
article written for projecteducate
by Tudalia-Hex

