Site Header

Deviation Actions


Promoted Deviations


Suggested Deviants


Suggested Collections


Description
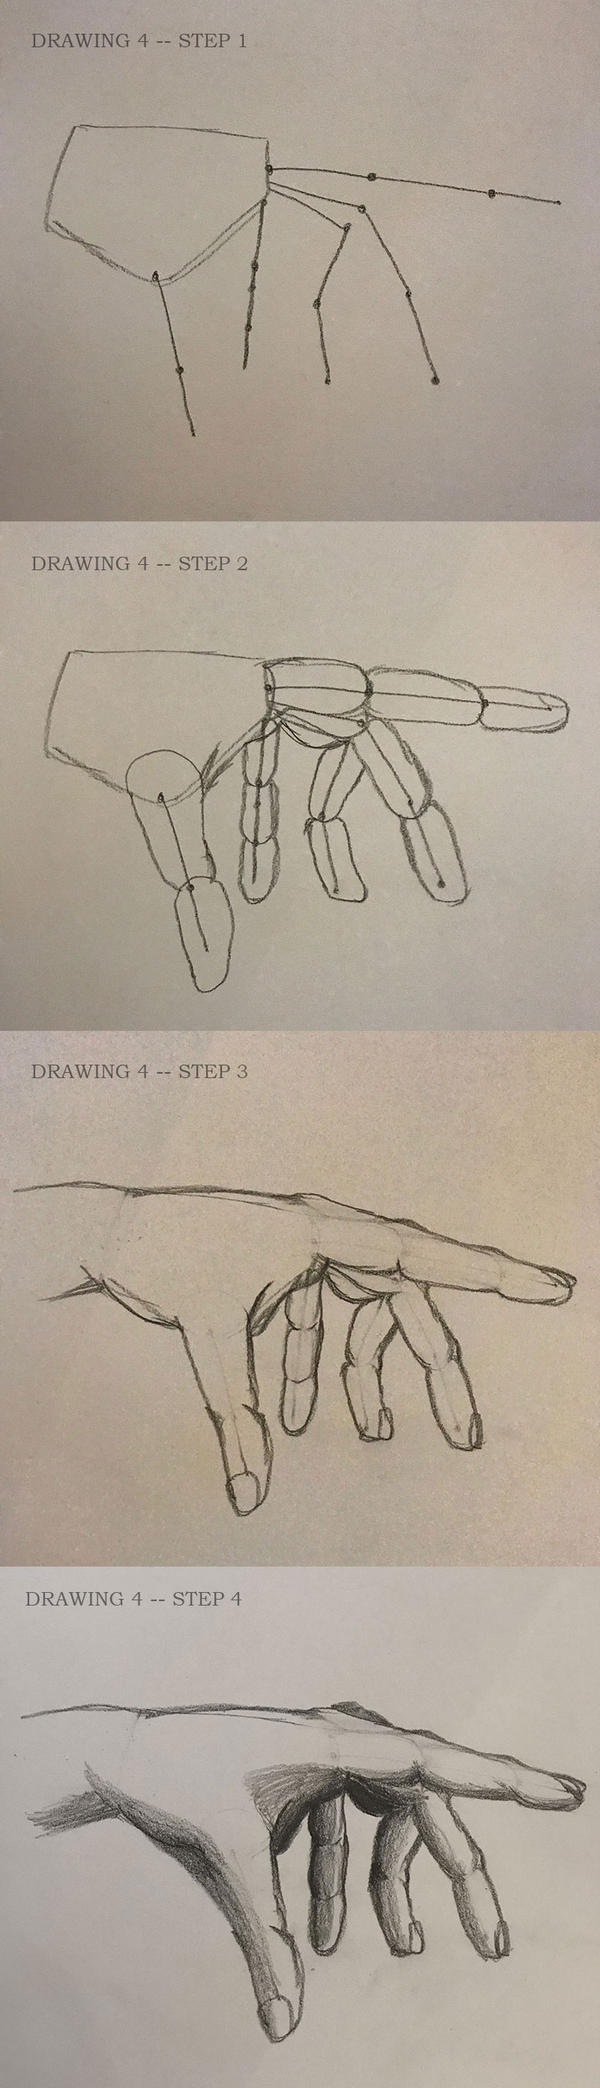
I recently had to do a freehand drawing of a human hand for school, and I found the guides provided so useful that I think it'd be a shame to not share it.
Step 1 :: Create a gesture sketch skeletal frame so you can get an idea of the posture. Remember that palms are general square except from the side where they're more quadrilateral in their form as shown. Only use stick form for the fingers and notate the joints with dots. If you need to, use a free hand to get an idea of the orientation.
Step 2 :: Use further gesture sketching to put meat on the bones. Fingers between joints are generally ovular when they are folded while more rod-like when extended. This gives you a good place to place the contours that we will explore later. Don't erase anything at this point! This is just to create the form of the hand and palm.
Step 3 :: This is where your eraser will come in. Erase the skeletal forms in the fingers, but try to maintain the spaces between each shape in the finger. Go ahead and ridges to the tops of the fingers to create the bone joint. Contour with gesture sketching each fold in the finger and palm if visible. When it comes to the folds of the finger, the first joint closest to the palm has two creases in it, while the joint closest to the point generally only has one crease. Round out the thumb base as it has the largest of the hand attacked to it.
Step 4 :: Shade, shade, shade! The more folded the hand is, the contouring we did will be stronger; the less folded the hand is, the lighter the contouring will be. Have a strong sense where the light is hitting it.
And there you go!
Image size
800x2783px 325.5 KB
Comments0
Join the community to add your comment. Already a deviant? Log In